KAmodRPI Pico Proto: Difference between revisions
From Kamamilabs.com - Wiki
No edit summary |
|||
| Line 1: | Line 1: | ||
__jzpdf__ | __jzpdf__ | ||
===== Description ===== | ===== Description ===== | ||
Universal board for prototyping circuits with Raspberry Pi Pico <br> <br> | [https://kamami.pl/en/other-modules/1194333-kamodrpi-pico-proto-prototype-board-for-raspberry-pi-pico-5906623488087.html KAmodRPI Pico Proto] - Universal board for prototyping circuits with Raspberry Pi Pico <br> <br> | ||
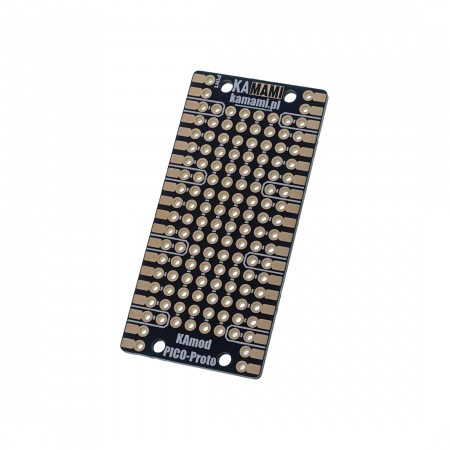
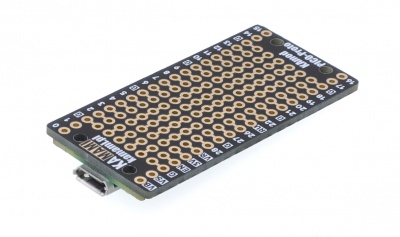
The <b>KAmodRPI PICO Proto</b> universal board contains a grid of metalized holes arranged in a standard 2.54 mm pitch and connected in groups. This is a characteristic structure of each universal board, which facilitates the creation of simple electronic circuits. The Raspberry Pi Pico module can be mounted using goldpins or directly on the surface of the board. Additional markings facilitate the identification of individual signals. | The <b>KAmodRPI PICO Proto</b> universal board contains a grid of metalized holes arranged in a standard 2.54 mm pitch and connected in groups. This is a characteristic structure of each universal board, which facilitates the creation of simple electronic circuits. The Raspberry Pi Pico module can be mounted using goldpins or directly on the surface of the board. Additional markings facilitate the identification of individual signals. | ||
<center> | <center> | ||
Revision as of 15:43, 26 October 2024

Description
KAmodRPI Pico Proto - Universal board for prototyping circuits with Raspberry Pi Pico
The KAmodRPI PICO Proto universal board contains a grid of metalized holes arranged in a standard 2.54 mm pitch and connected in groups. This is a characteristic structure of each universal board, which facilitates the creation of simple electronic circuits. The Raspberry Pi Pico module can be mounted using goldpins or directly on the surface of the board. Additional markings facilitate the identification of individual signals.
Basic Features and Parameters
- adapted to Raspberry Pi Pico boards
- contains a grid of metalized holes arranged in a standard 2.54 mm raster
- markings make it easy to identify individual signals
- the Raspberry Pi Pico module can be mounted using goldpins or directly on the board surface
- mounting holes correspond to the holes on the Raspberry Pi Pico board
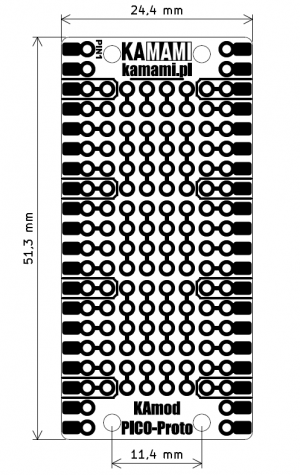
- board dimensions: 51.3x24.4 mm
Standard equipment
| Code | Description |
|---|---|
| KAmodRPI PICO Proto |
|
Electrical connections diagram
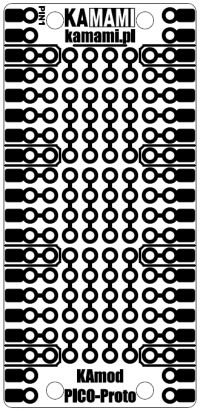
The electrical connections between the individual points are shown in the drawing below - this is a view from the top. Copper paths connecting the individual holes are only routed on the bottom side of the board.
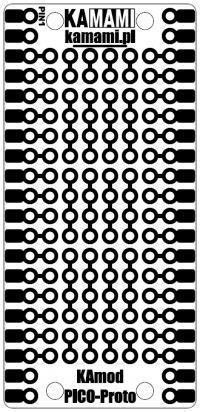
Signal markings
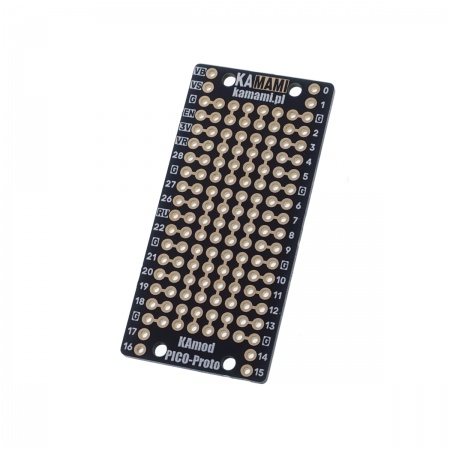
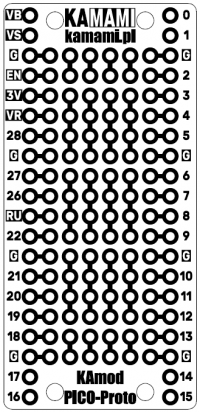
The electrical connections between the individual points are marked on the top side of the board. Additionally, the points that constitute the power supply ground in the Raspberry Pi Pico module are marked.
The bottom of the board has markings to help identify signals - they correspond to the markings of the Raspberry Pi Pico module.
Raspberry Pi Pico module assembly method
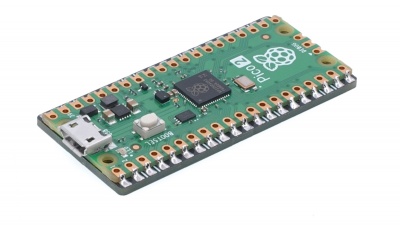
The Raspberry Pi Pico module can be mounted using goldpins. Then, place the board on the pins of the Raspberry Pi Pico module and solder it as shown in the photos.
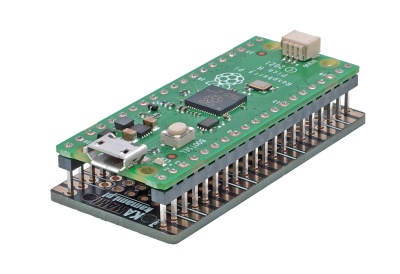
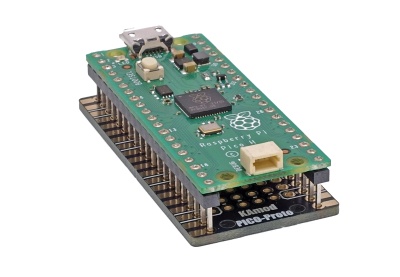
Another way to mount the Raspberry Pi Pico module is to solder it directly onto the surface of the KAmodRPI PICO-Proto board. Before doing so, cover the bottom of the RPI Pico board with, for example, Kapton tape
https://kamami.pl/tasmy/561694-tasma-kaptonowa-o-szerokosci-20mm-i-dlugosci-33m-5906623482467.html
to prevent short circuits between the boards. The boards should be soldered by connecting the RPI Pico edge contacts to the appropriate pads on the universal board as shown in the photos.
Dimensions
The dimensions of the KAmod PICO-Proto board are: 51.3x24.4 mm
