ZL33PRG: Difference between revisions
From Kamamilabs.com - Wiki
No edit summary |
|||
| Line 15: | Line 15: | ||
*equipped with a microUSB connector | *equipped with a microUSB connector | ||
*enables programming and debugging of microcontrollers work with ARM Cortex core | *enables programming and debugging of microcontrollers work with ARM Cortex core | ||
*drag-and-drop programming function | *drag-and-drop programming function (depending on firmware version) | ||
*USB-UART (Virtual Serial Port) converter function | *USB-UART (Virtual Serial Port) converter function | ||
*USB powered | *USB powered | ||
Revision as of 12:31, 25 September 2019

Description
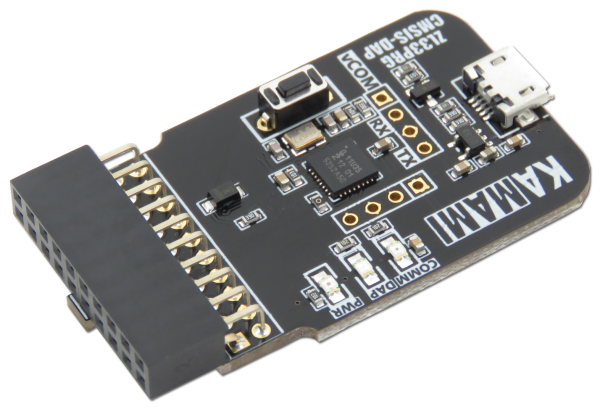
ZL33PRG is a debugger programmer with a USB connector that supports the SWD (Serial Wire Debbug) programming interface. ZL33PRG is based on CMSIS-DAP (Coresight Debug Access Port), which is a standard that allows programming and debugging microcontrollers with ARM Cortex core via a USB interface.
Introduction
CMSIS-DAP is a standard that provides a way to access programming and debugging of the ARM Cortex microcontroller via USB. CMSIS-DAP is usually implemented as a embedded chip that provides a direct USB connection and a debugger development kit running on a computer on one side and via SWD (Serial Wire Debug) to the target device. The use of the CMSIS-DAP standard in the ZL33PRG significantly speeds up the debugging process and the installation process, because the USB connection uses the HID driver class, which is built into every operating system. The device can work with free and evaluation versions of IDE utility programs, such as Keil MDK, IAR Workbench etc.
Basic parameter
- equipped with IDC20 connector
- equipped with a microUSB connector
- enables programming and debugging of microcontrollers work with ARM Cortex core
- drag-and-drop programming function (depending on firmware version)
- USB-UART (Virtual Serial Port) converter function
- USB powered
- firmware upgradeable
- signaling diodes: PWR_RED, COMM_GREEN, DAP_BLUE
- works with µVision (Keil), IAR Embedded Workbench (IAR) etc.
- target system operating voltage range: 1.65 - 3.6 V
Standard equipment
| Code | Description |
|---|---|
| ZL33PRG |
|
Programmer connection
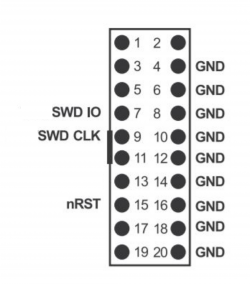
The ZL33PRG interface works with a PC via a USB connection. SWD signals for programming and debugging microcontrollers are led to the IDC20 connector. They are arranged in accordance with the JTAG industry standard for a 20-pin connector (see the figure below), so the programmer can be used with any set equipped with an ARM core microcontroller and equipped with an IDC20 JTAG connector.
| Attention!
The programmer does not support the JTAG interface. |
|---|
| Attention!
The ZL33PRG programmer is powered from a USB connector. Power is not transferred to the programmable/debug microcontroller, so you need to power it independently. |
|---|
Connecting UART to the programmer
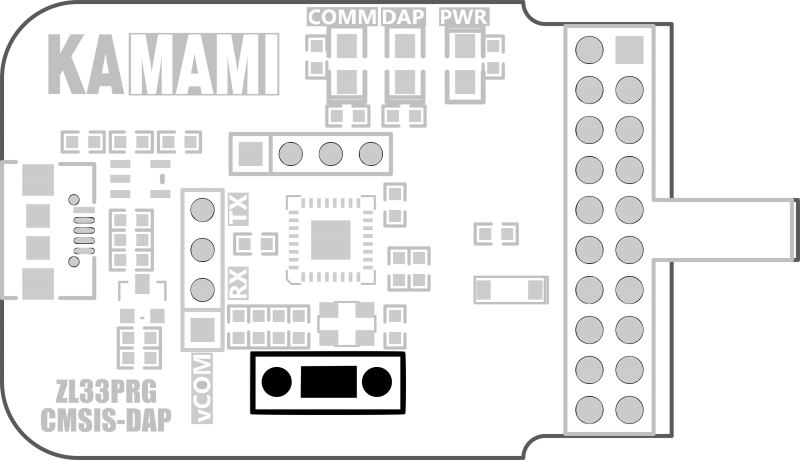
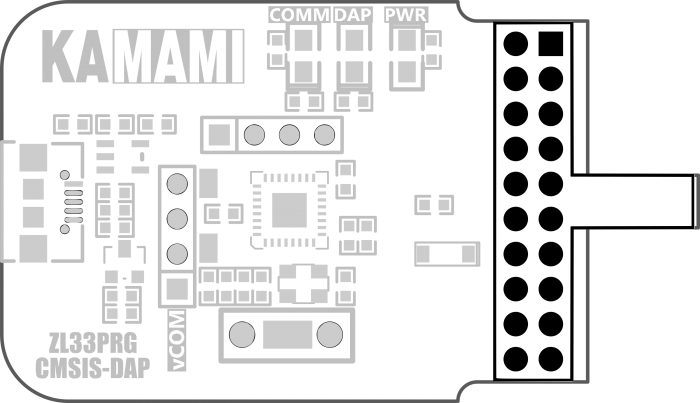
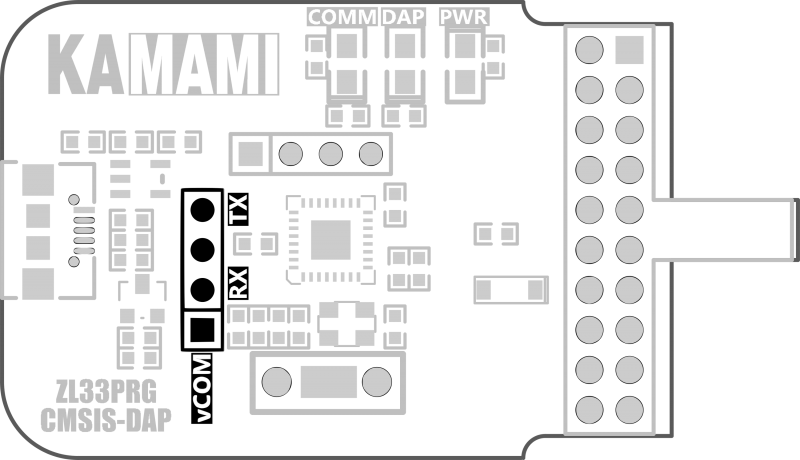
The programmer has the function of a virtual serial port. RxD and TxD signals are available on the vCOM connector as shown in the picture below. The holes on the back of the plate allow soldering of the goldpin strip. Linux and Mac OS do not require any drivers, a version of Windows earlier than Windows 10 will require a serial port driver.
Drag-and-drop programming
The programmer is equipped with the MSC function, which enables programming of the system using the drag-and-drop method. ZL33PRG appears on the host computer as a USB drive. Program files in binary (.bin) or hexadecimal (.hex) format can be copied to a USB drive, which then programs them in the target system's memory.
| Attention!
The programmer may have a pre-loaded version of the software that does not support the drag-and-drop programming function (a device called "CRP Disabled" appears). The process of updating the firmware is described in the chapter "Updating the device software". |
|---|
Updating the device software
You can update the ZL33PRG software. To upload/update the device firmware:
1. Disconnect the device and reconnect it with the pressed button on the programmer (photo below). 2. Delete the "firmware.bin" file from the device. 3. Download the latest version of the charge (link provided below). 4. Copy the new file to disk. 5. Disconnect the device and reconnect.
